ADC-V731B Battery Indoor/Outdoor Camera Guide
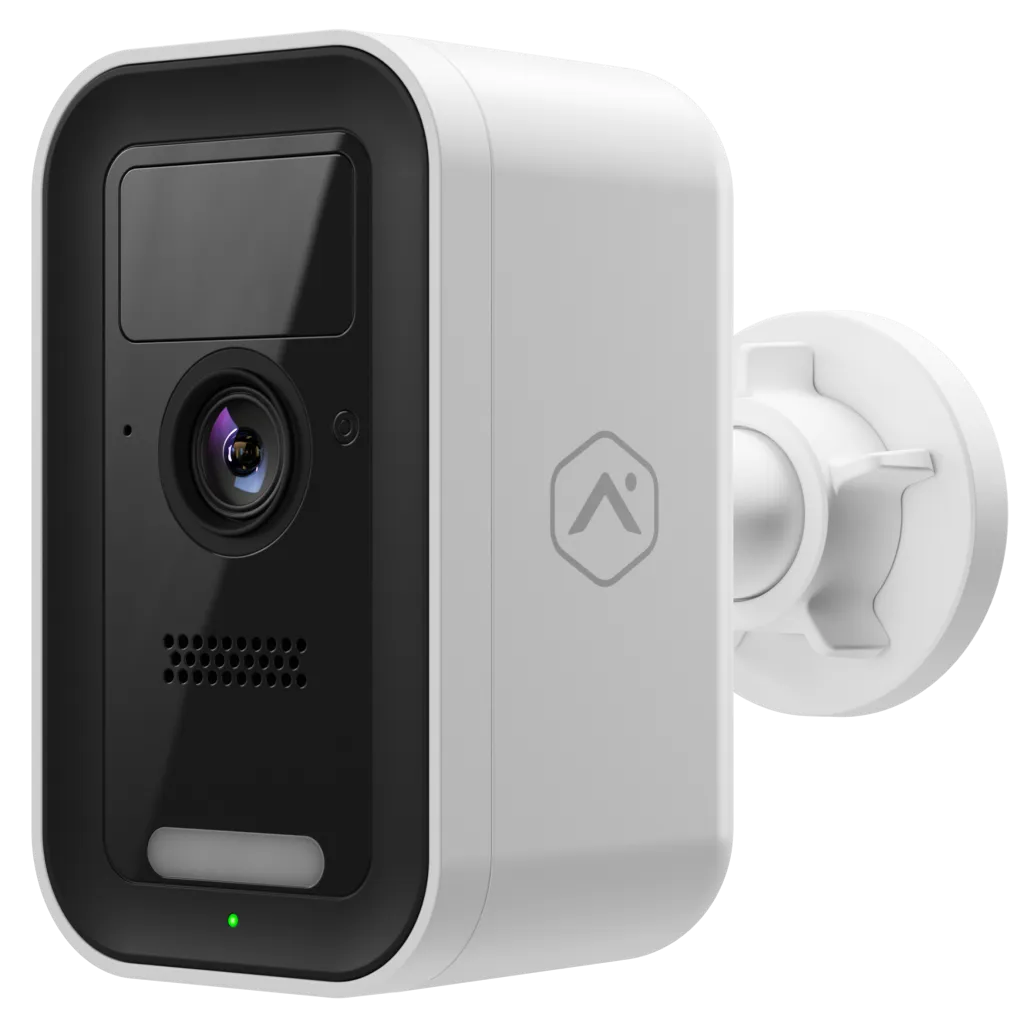
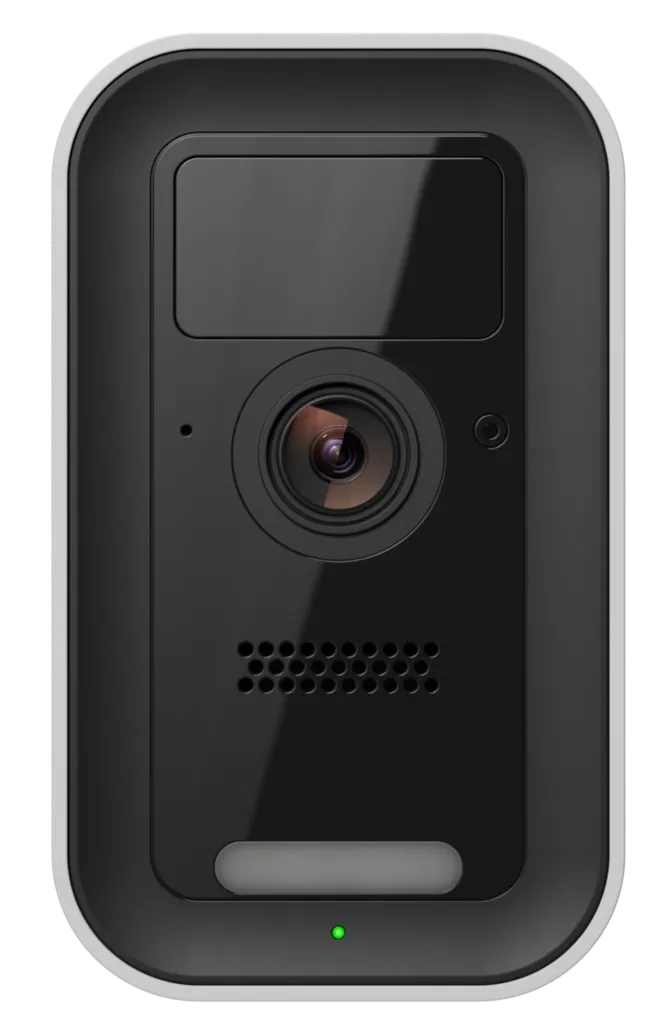
This guide covers everything you need to know about the Brinks Home™ Battery Powered Indoor/Outdoor Camera (ADC-V731B), including features, setup, troubleshooting, and tips for getting the most out of your camera.
Navigate to the section you're looking for using the links below:
Product Overview
The Brinks Home Battery Powered Camera (ADC-V731B) is a smart outdoor security camera with advanced Video Analytics, spotlight, and two-way audio, empowering you to detect and deter unwanted activity in real time. It is also the first Alarm.com camera to use solar panel charging when used with the Alarm.com Solar Panel! With options for cloud storage or continuous 24/7 onboard recording, it offers flexible protection tailored to your needs.
Getting Started
Features
- Spotlight enabled color night vision
- Bluetooth enrollment
- Two-way audio to hear and speak with visitors
- Perimeter Guard
- Microphone and speaker
- Video Analytics for smarter detection and relevant alerts
- Wi-Fi (2.4 or 5 GHz)
- Audio included in recorded clips for additional awareness
- Compatible with the Brinks Home™ Mobile App
- Improved mount for long-term stability
- Easier access to microSD card door
Solar Panel
When paired with the Alarm.com solar panel (ADC-VACC-SP4W), the ADC-V731B can be constantly charging, removing the need to manually charge or replace the battery. To learn more about the Alarm.com solar panel, click here.
Setup Instructions
Connecting to Wi-Fi Using Bluetooth (Recommended)
Note: This method will also enroll the device to your account as part of the process.
Step-By-Step Instructions:
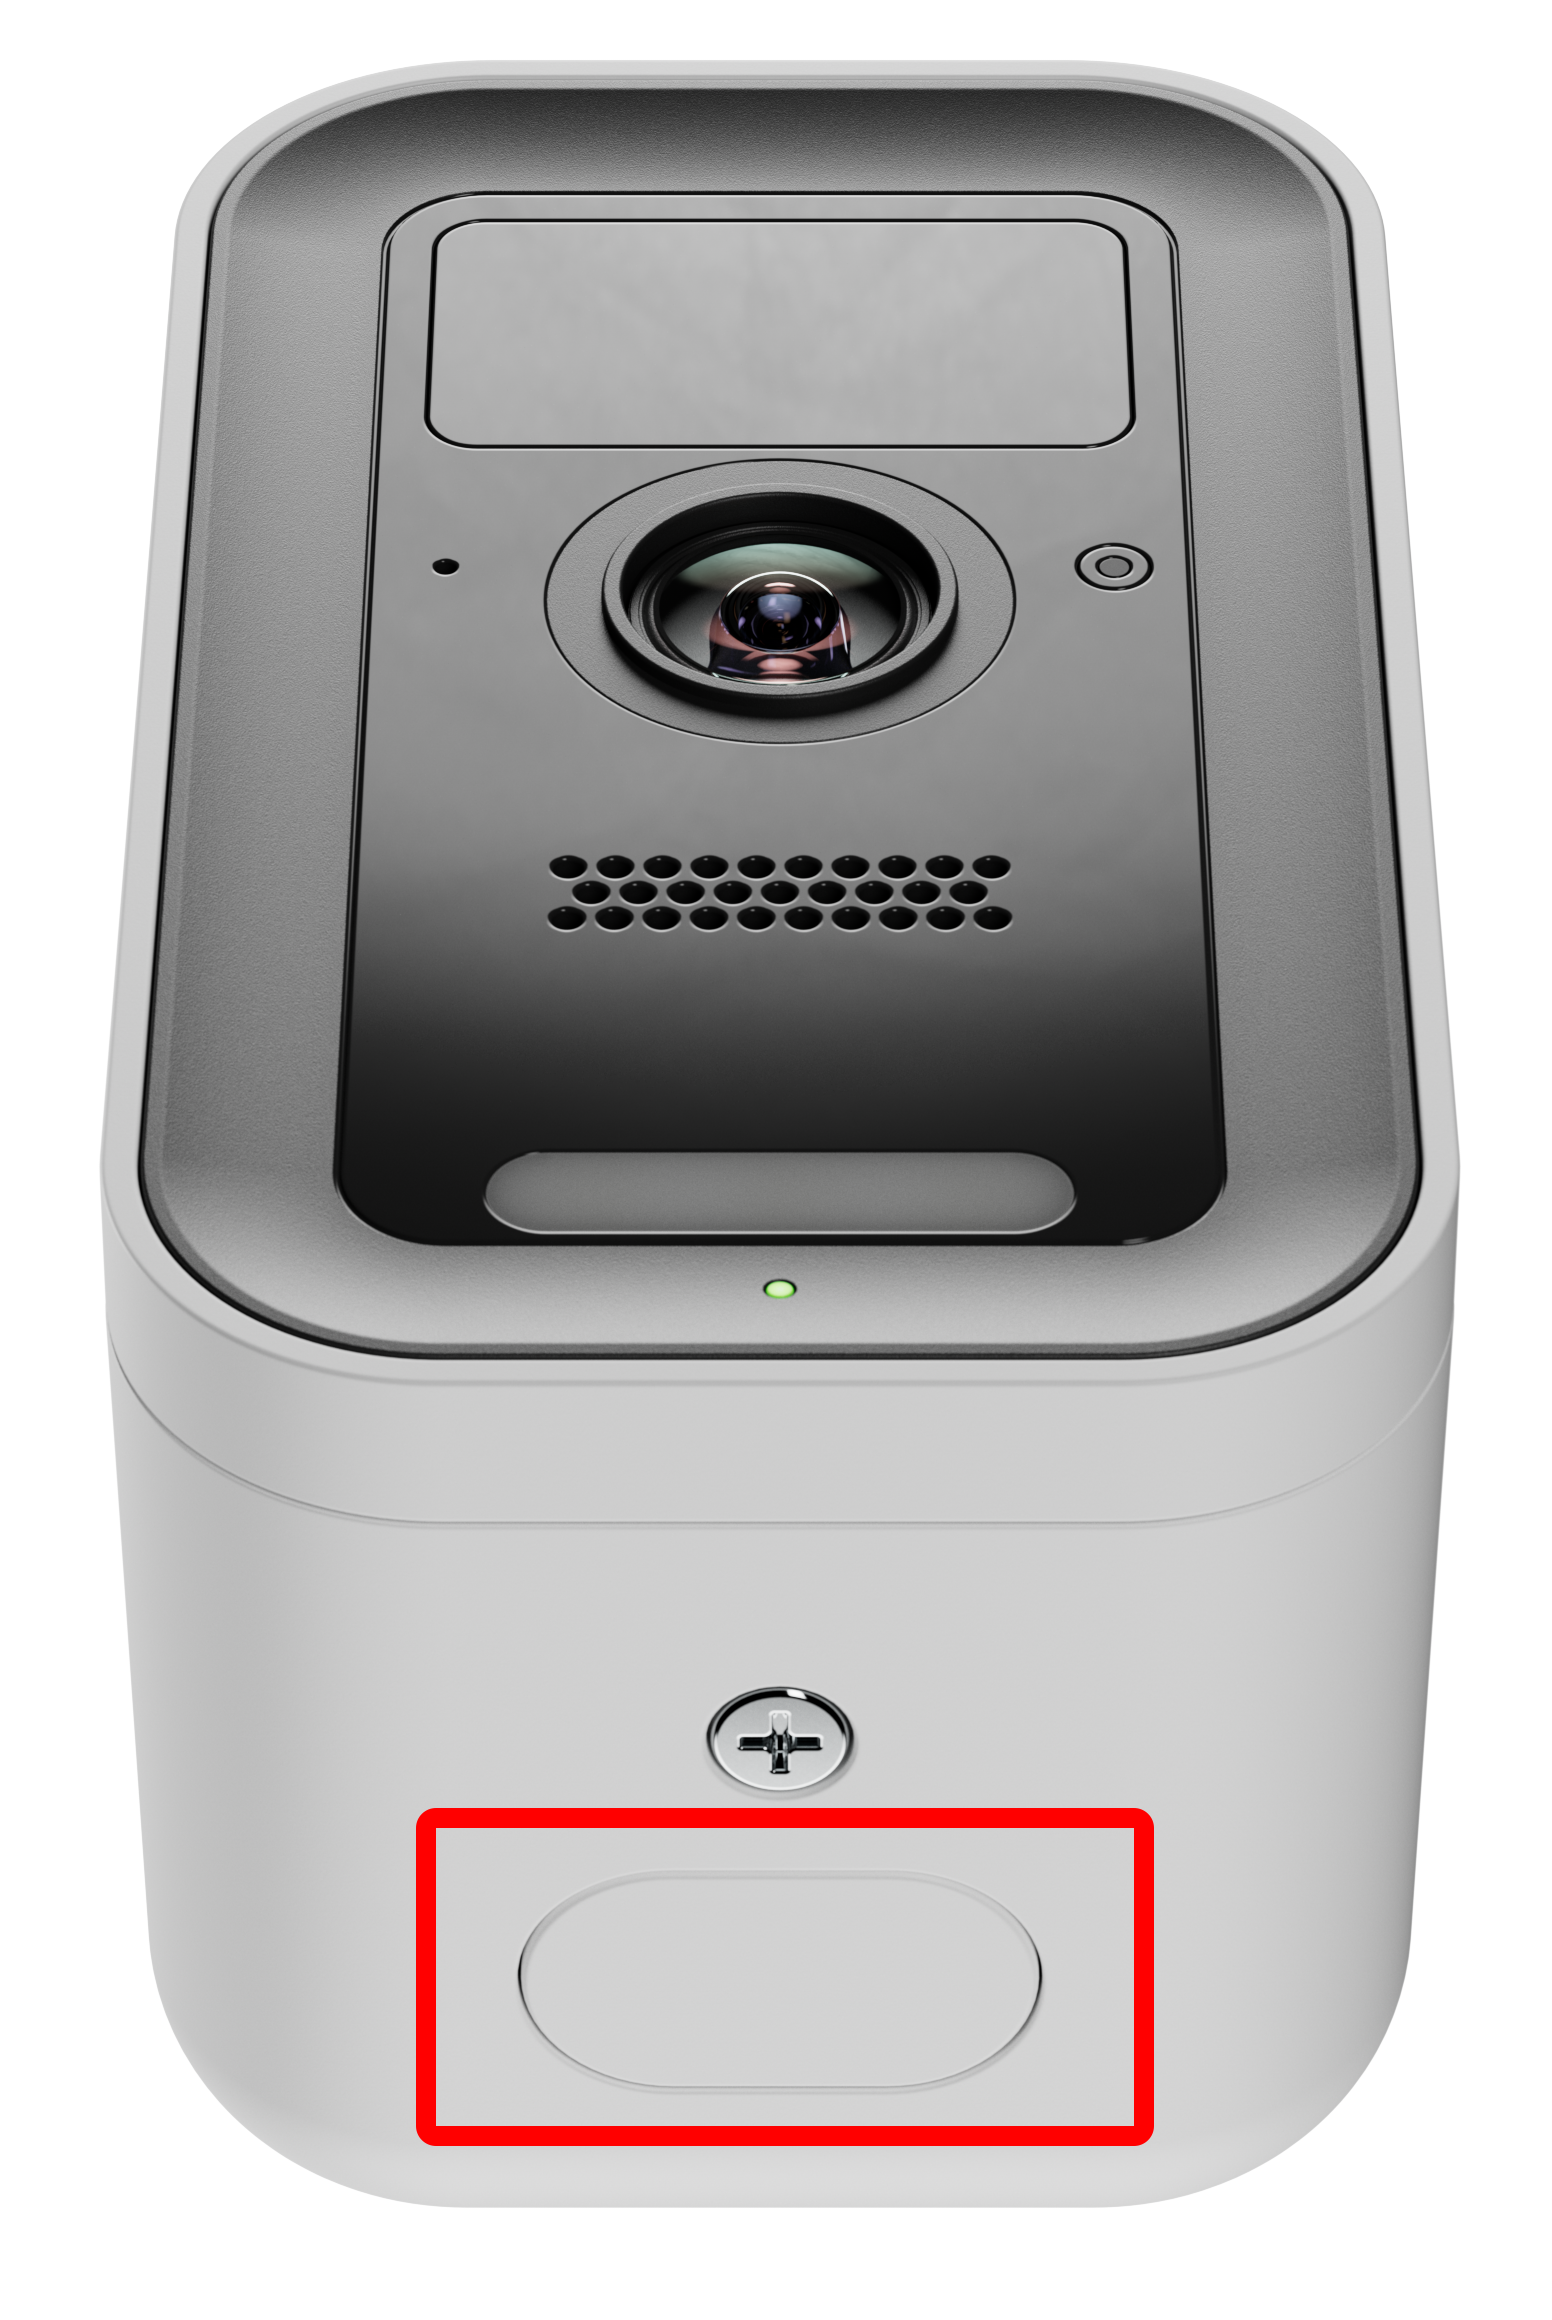
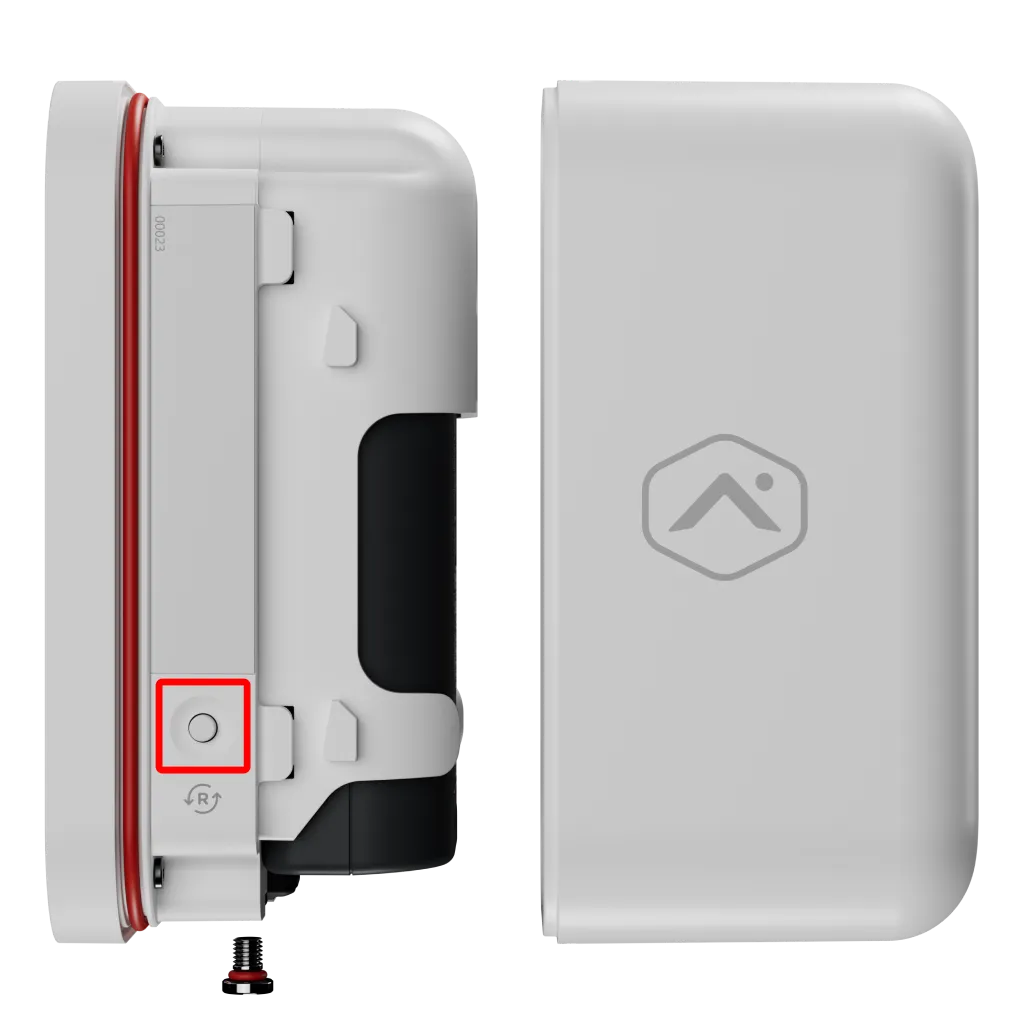
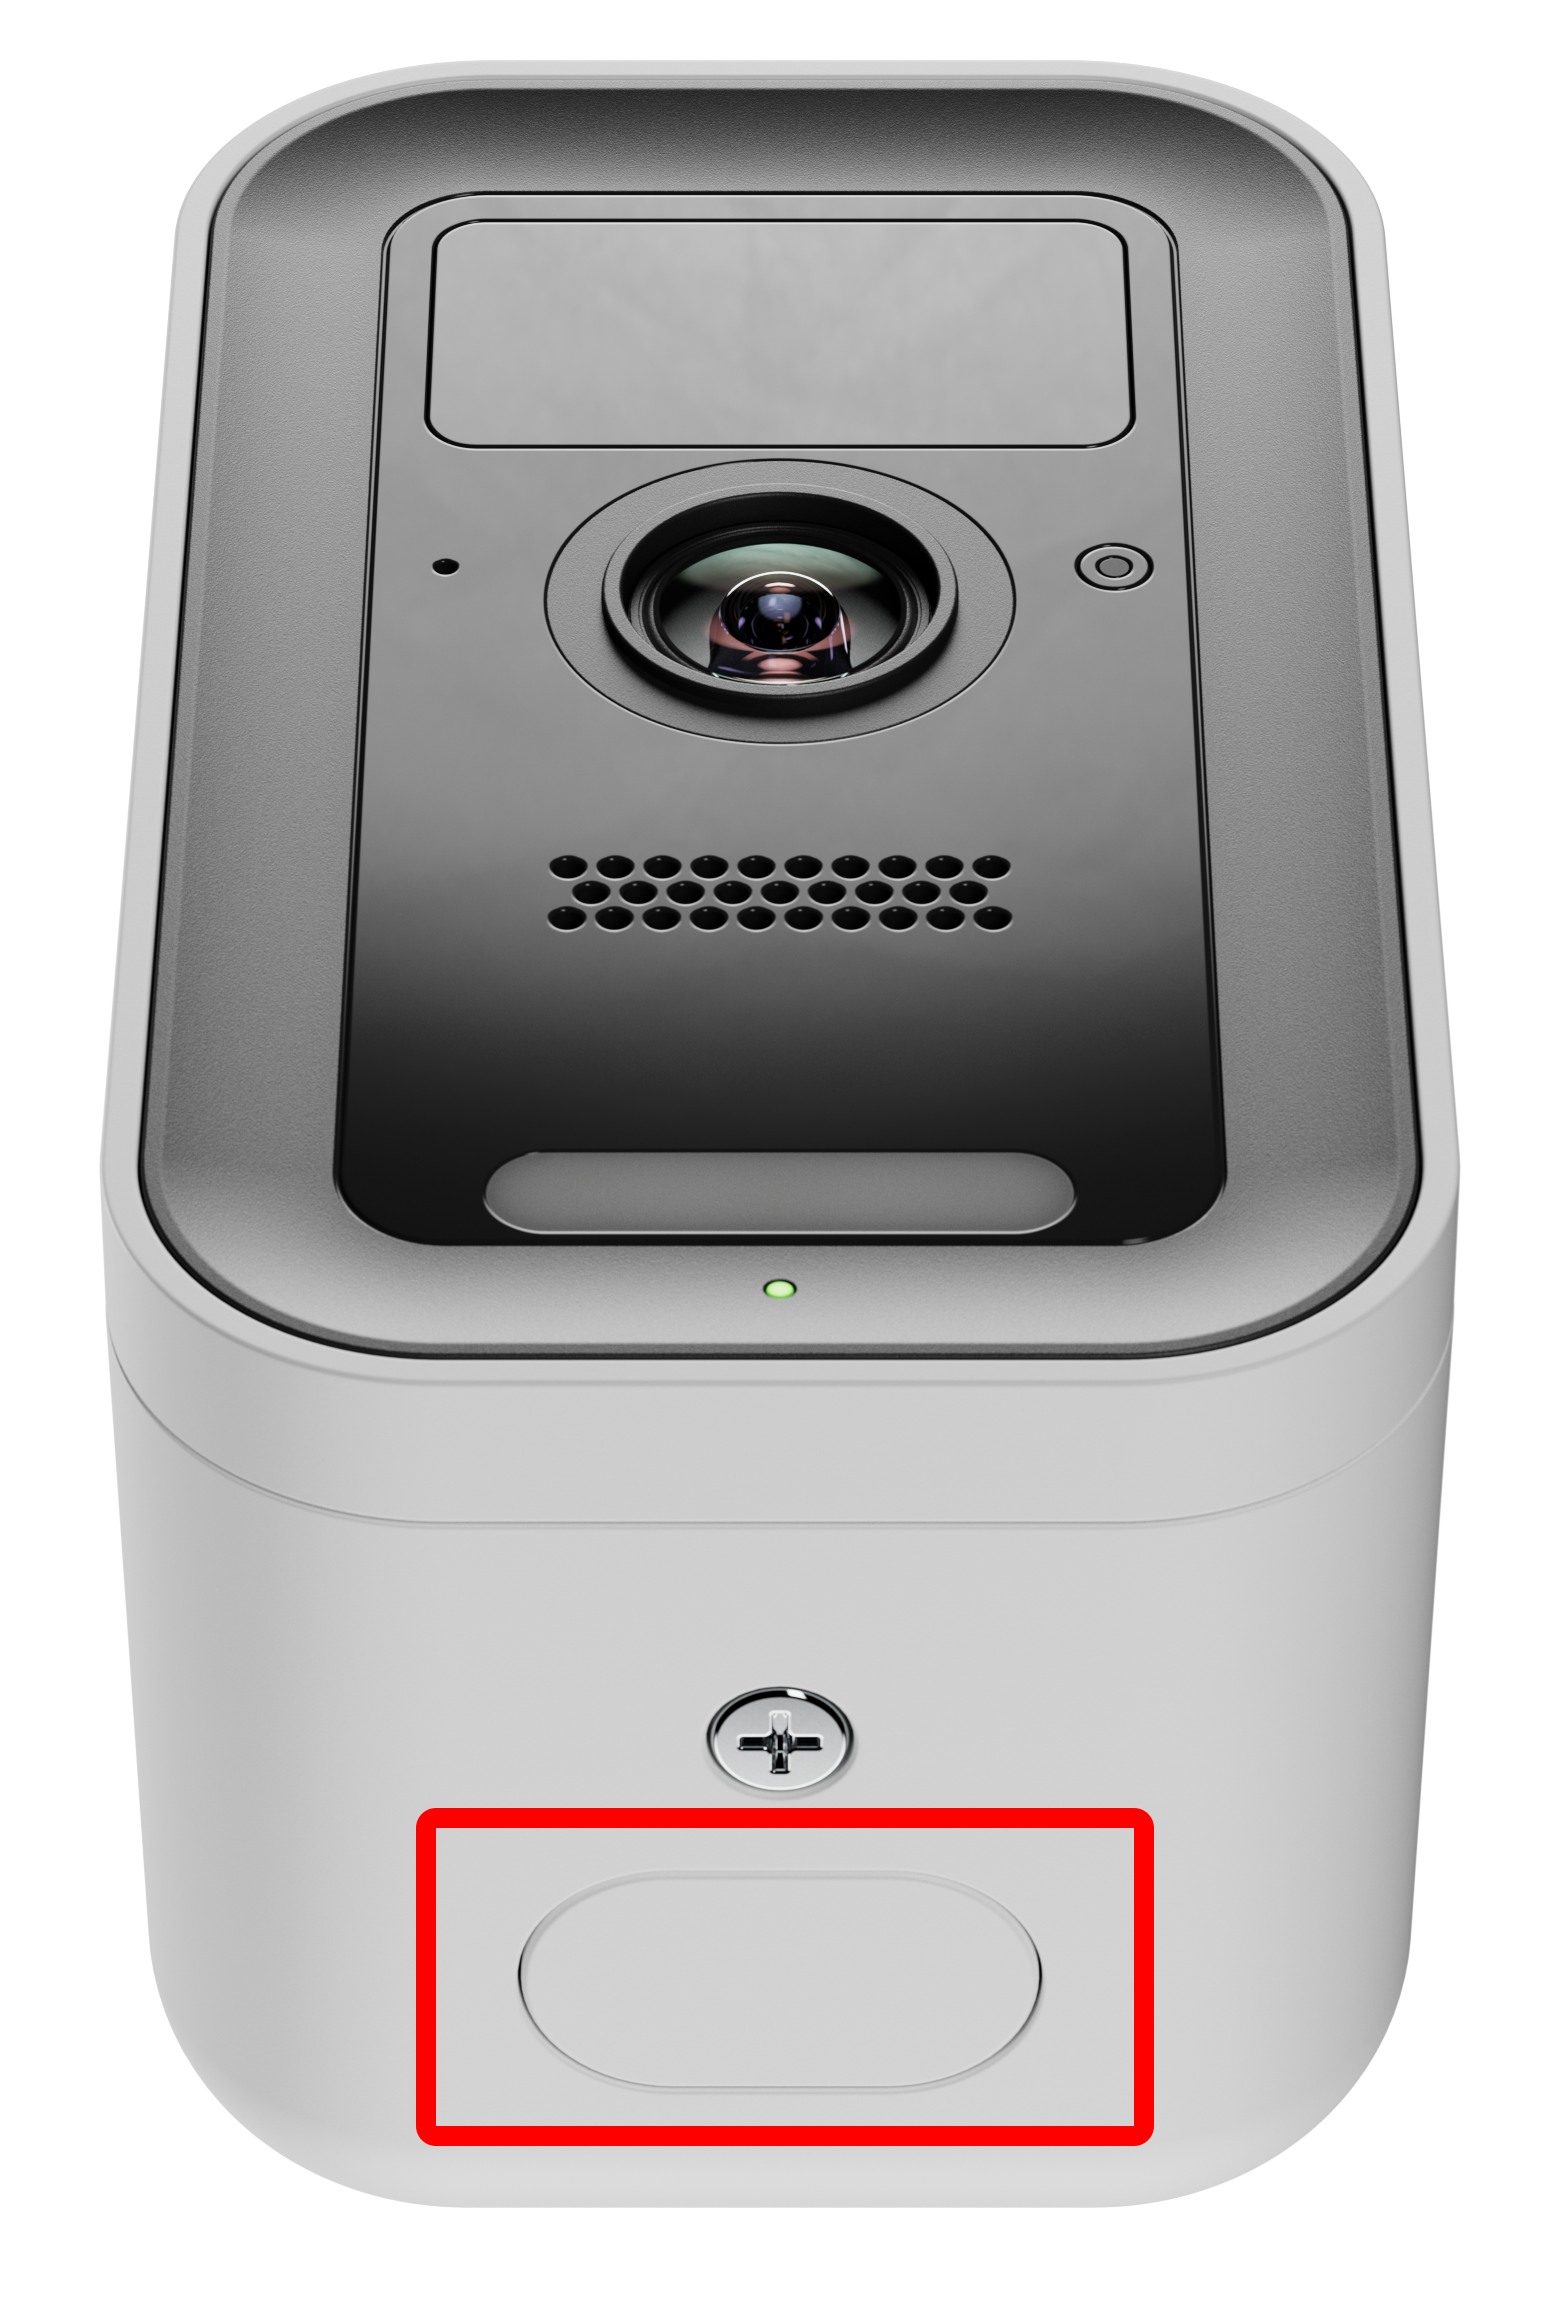
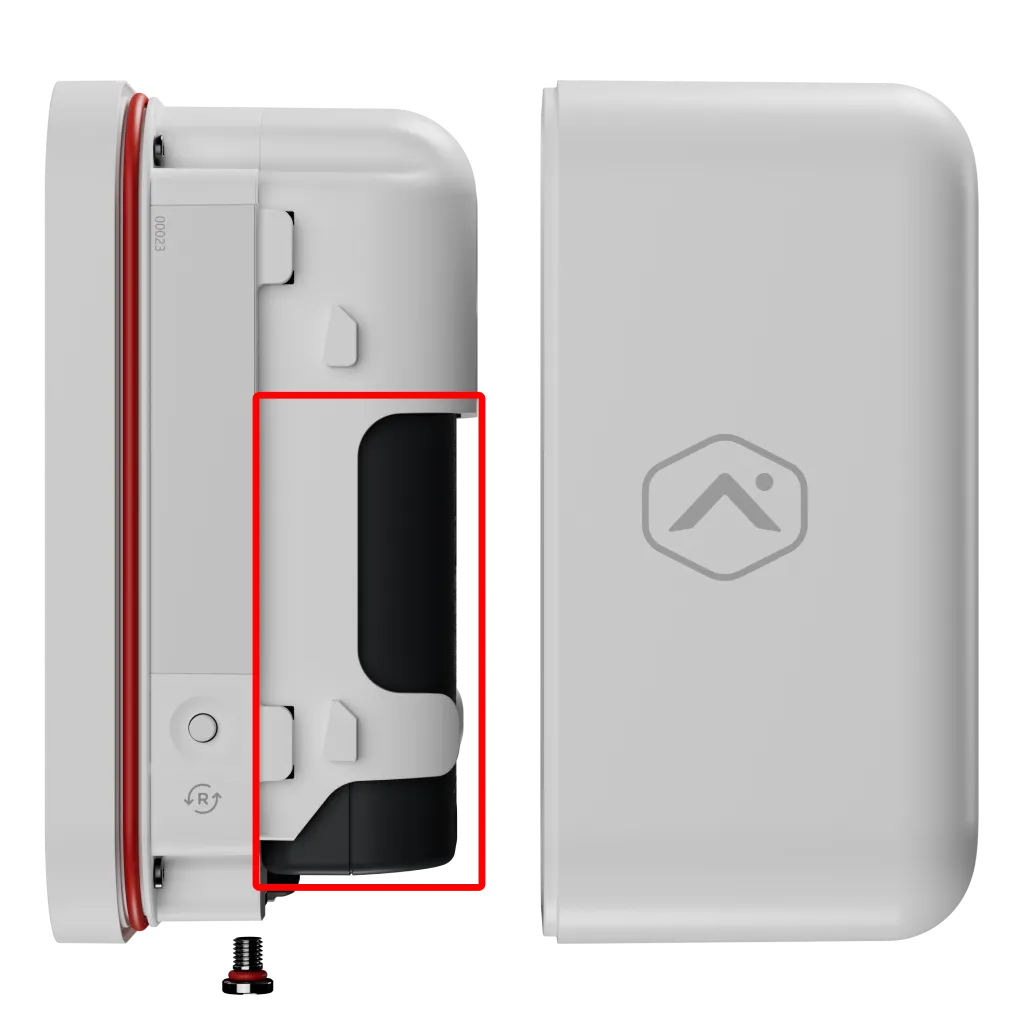
- Open the camera by undoing the screw on the bottom of the camera, then press the button to release the back housing.
- Hold the reset button on the right side of the camera for 3 seconds until the LED on the front of the camera flashes white (If the LED is already flashing white, proceed to the next step).
- On a Bluetooth-enabled mobile device, login to your Brinks Home™ app.
- Tap More.
- Tap Add Device.
- Tap Video.
- Scroll to find the device or use the Find Device search bar to enter the model number, then tap to select the device to add.
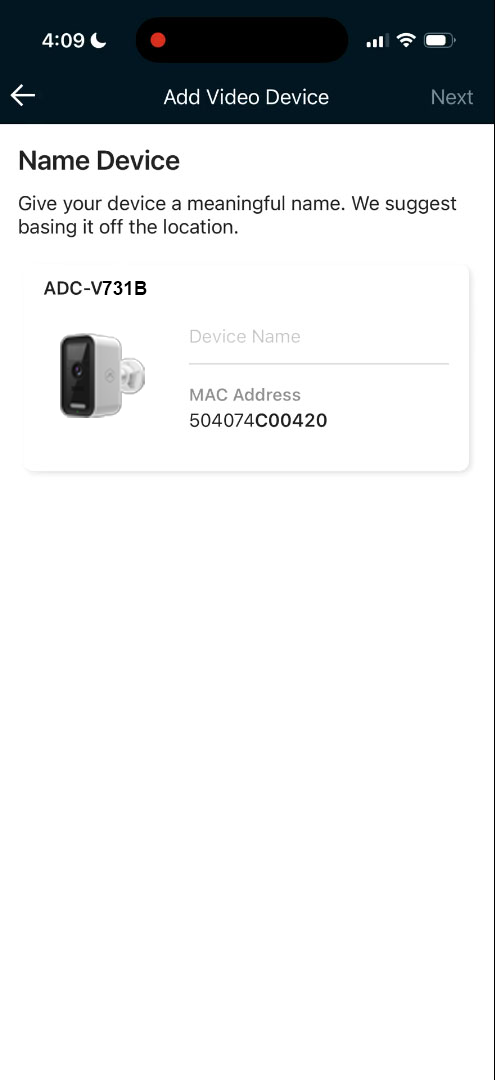
- Enter a Device Name, then tap Next.
- The app will ask you to confirm the LED is flashing white. Tap Next.
- If Bluetooth is not enabled on your mobile device, approve the Bluetooth permission request when prompted, and then tap Next.
- Bring your mobile device close to the device being enrolled, then tap Scan.
- Allow time for your mobile device to scan for devices in the area.
- Select the device to set up. Verify the selected device's MAC address matches the MAC address on the device being enrolled, then tap Connect.
- Keep your phone near the device while it connects.
- Once your phone is connected to the device, tap to select the Wi-Fi network. Either:
- Select a known network in My Wi-Fi Networks, or
- Select a new network in Other Networks, enter the password for the Wi-Fi network, and then tap Connect.
- Allow a few minutes for the device to connect to the network.
- Once the device connects to the Wi-Fi network, the device continues to complete the install on your account. Once the installation is complete, verify the video device works properly.
If you encounter issues enrolling through Bluetooth, follow the AP Mode steps to connect your camera to your Wi-Fi.
Connecting to Wi-Fi Using AP Mode
Step-By-Step Instructions:
- Open the camera by undoing the screw on the bottom of the camera, then press the button to release the back housing.
- Hold the reset button on the right side of the camera for 3 seconds until the LED on the front of the camera flashes white (If the LED is already flashing white, proceed to the next step).
- Open your smartphone's Wi-Fi settings and look for ADC-V731B (xx:xx:xx), then press Connect.
- Open a web browser and enter 192.168.1.1 in the search bar, then click Scan to search for Wi-Fi networks.
- Select your Wi-Fi network, scroll up and enter your Wi-Fi credentials, press Submit, then OK.
- The camera LED will turn green if successful, or red if there is a failure.
Note: Once connected to Wi-Fi, you will need to enroll the camera to your account through the app or website using the steps listed in this article.
If you encounter issues enrolling through AP Mode, follow the WPS Mode steps to connect your camera to your Wi-Fi.
Connecting to Wi-Fi Using WPS Mode
Step-By-Step Instructions:
- Open the camera by undoing the screw on the bottom of the camera, then press the button to release the back housing.
- Hold the reset button on the right side of the camera for 6 seconds until the LED on the front of the camera flashes Blue.
- Press and release the router's WPS button or enable WPS through the router's settings.
- The LED on the camera may turn red during this step. Wait up to 2 minutes for the LED to flash then turn solid green to confirm a successful connection.
Note: Once connected to Wi-Fi, you will need to enroll the camera to your account through the app or website using the steps listed in this article.
Add Camera Using the Brinks Home Mobile App
Note: The camera must be connected to Wi-Fi first so it can be added to your account.
Step-By-Step Instructions:
- Log in to the Brinks Home Mobile App then press Video.
- Select Settings by pressing the gear icon in the upper right-hand corner.
- Select Add Device +, then select the video device you want to add.
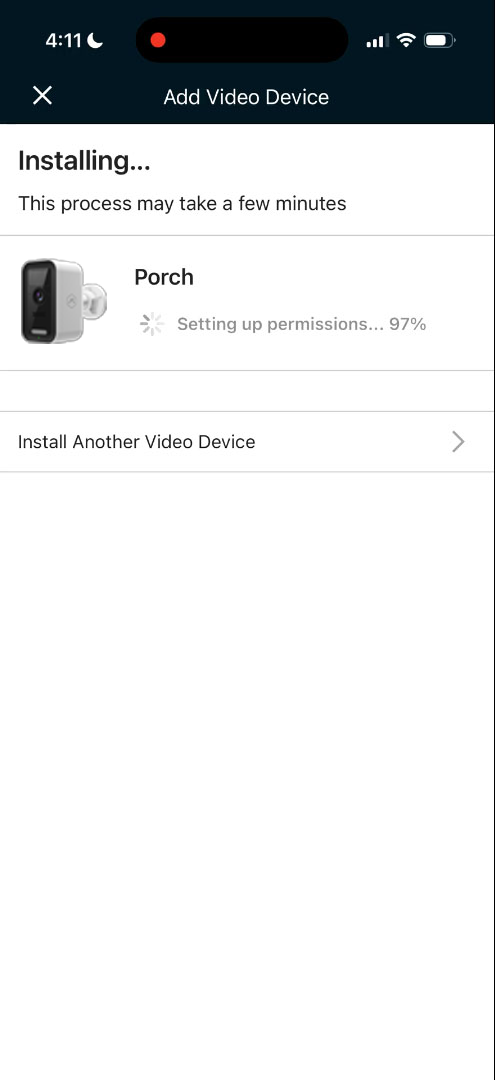
- The system should detect the camera. Enter the camera name and click Next.
- The camera will be added to your account, which can take several minutes.
- When finished, select Live to view images from the newly installed camera.



Add Camera Using the Brinks Home Alarm.com Website
Note: The camera must be connected to Wi-Fi first so it can be added to your account.
Step-By-Step Instructions:
- Log in to the Brinks Home Alarm.com website, then select Video.
- Select Settings.
- Scroll to the bottom of the page and select Add Video Device.
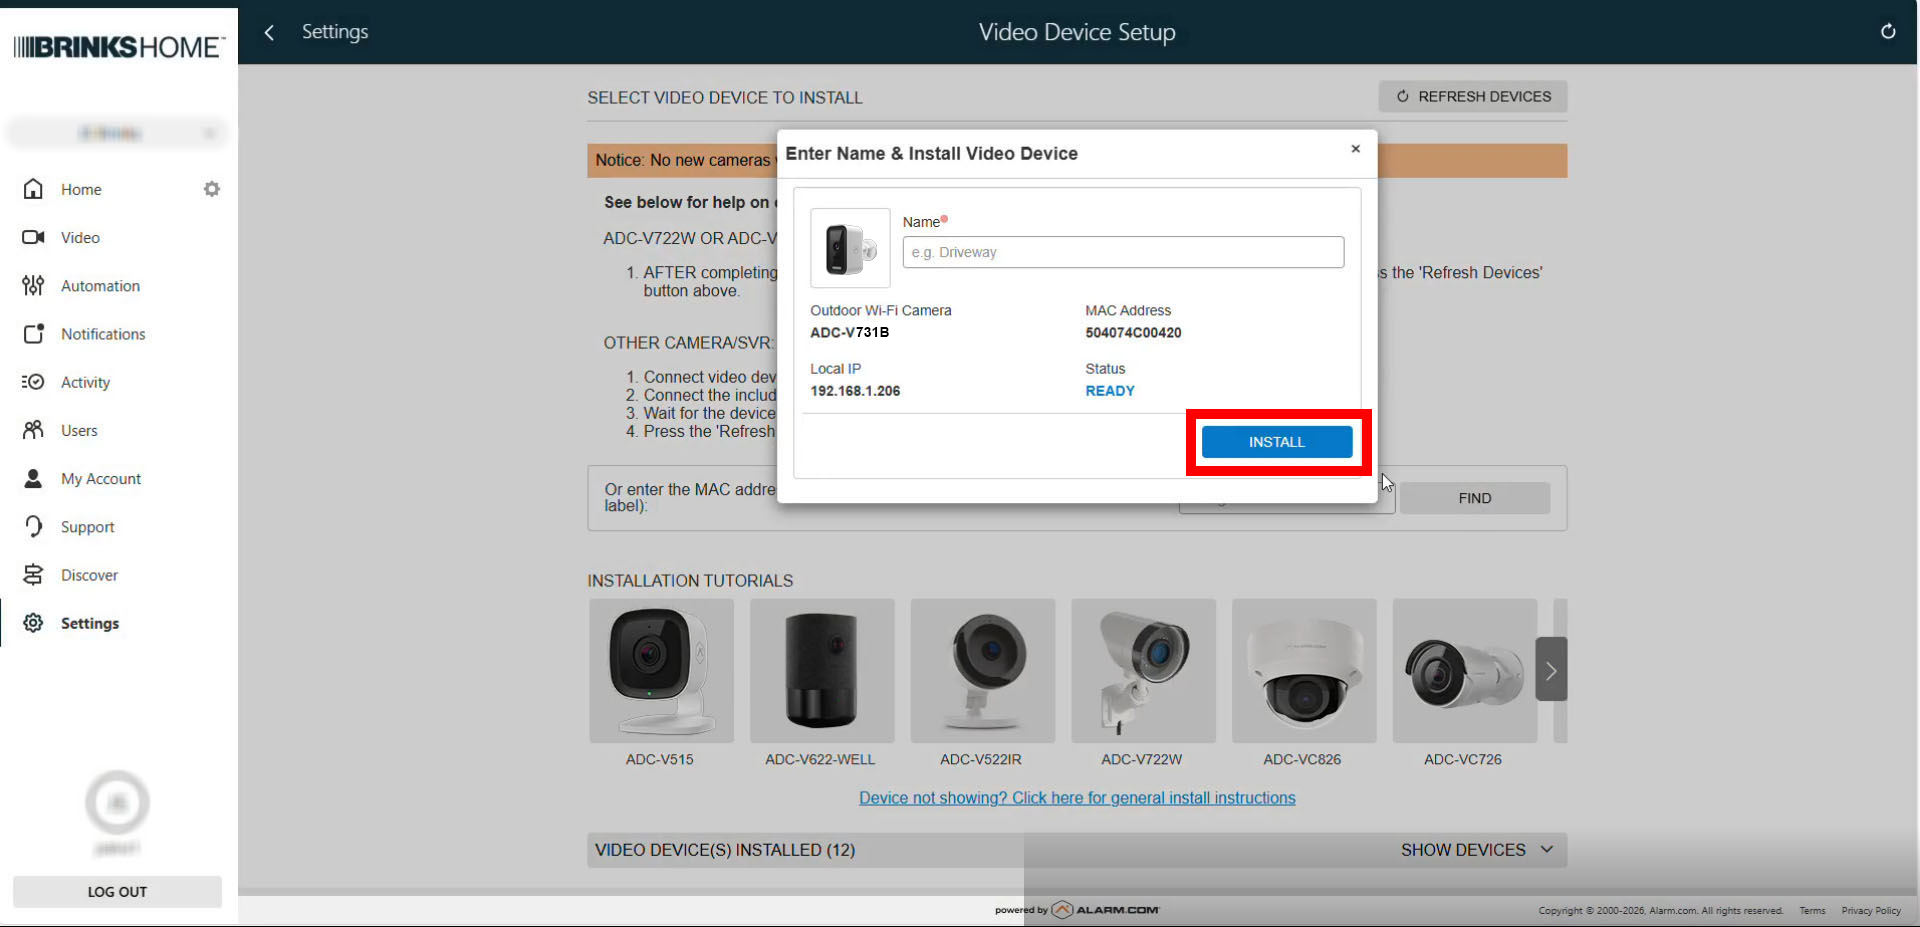
- The system should detect the camera. Enter the camera name and click Install.
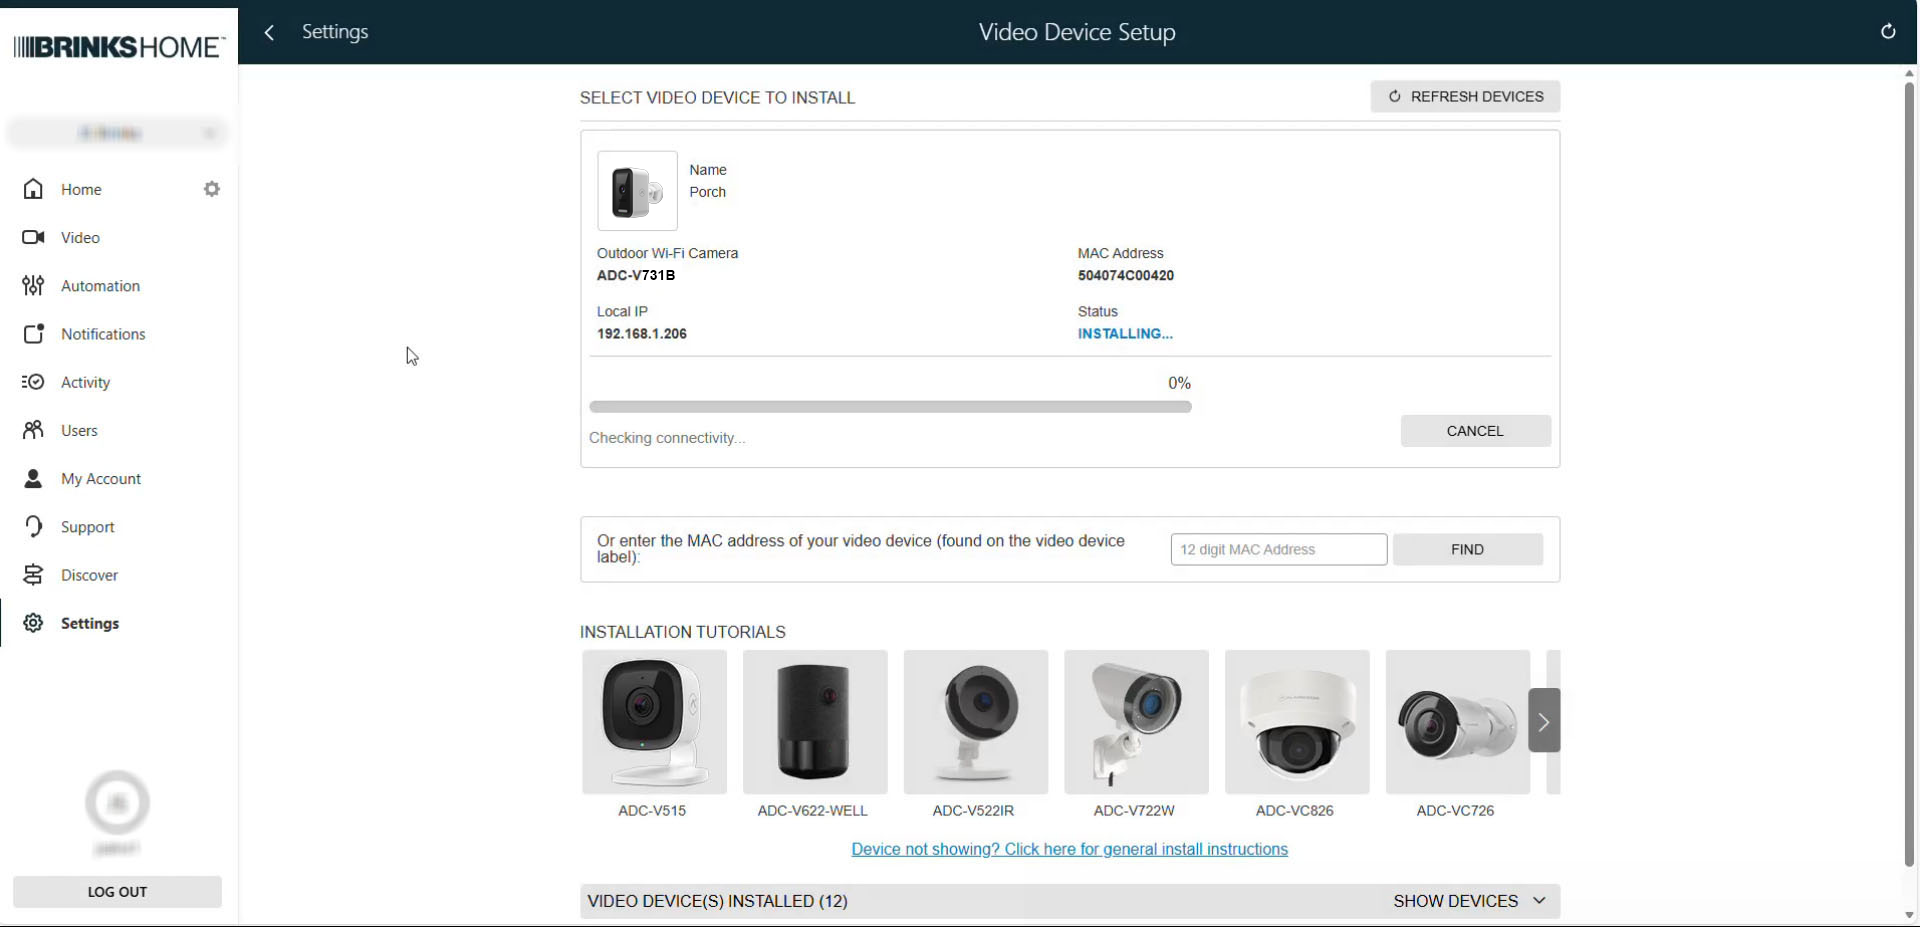
- The camera will be added to your account, which can take several minutes.
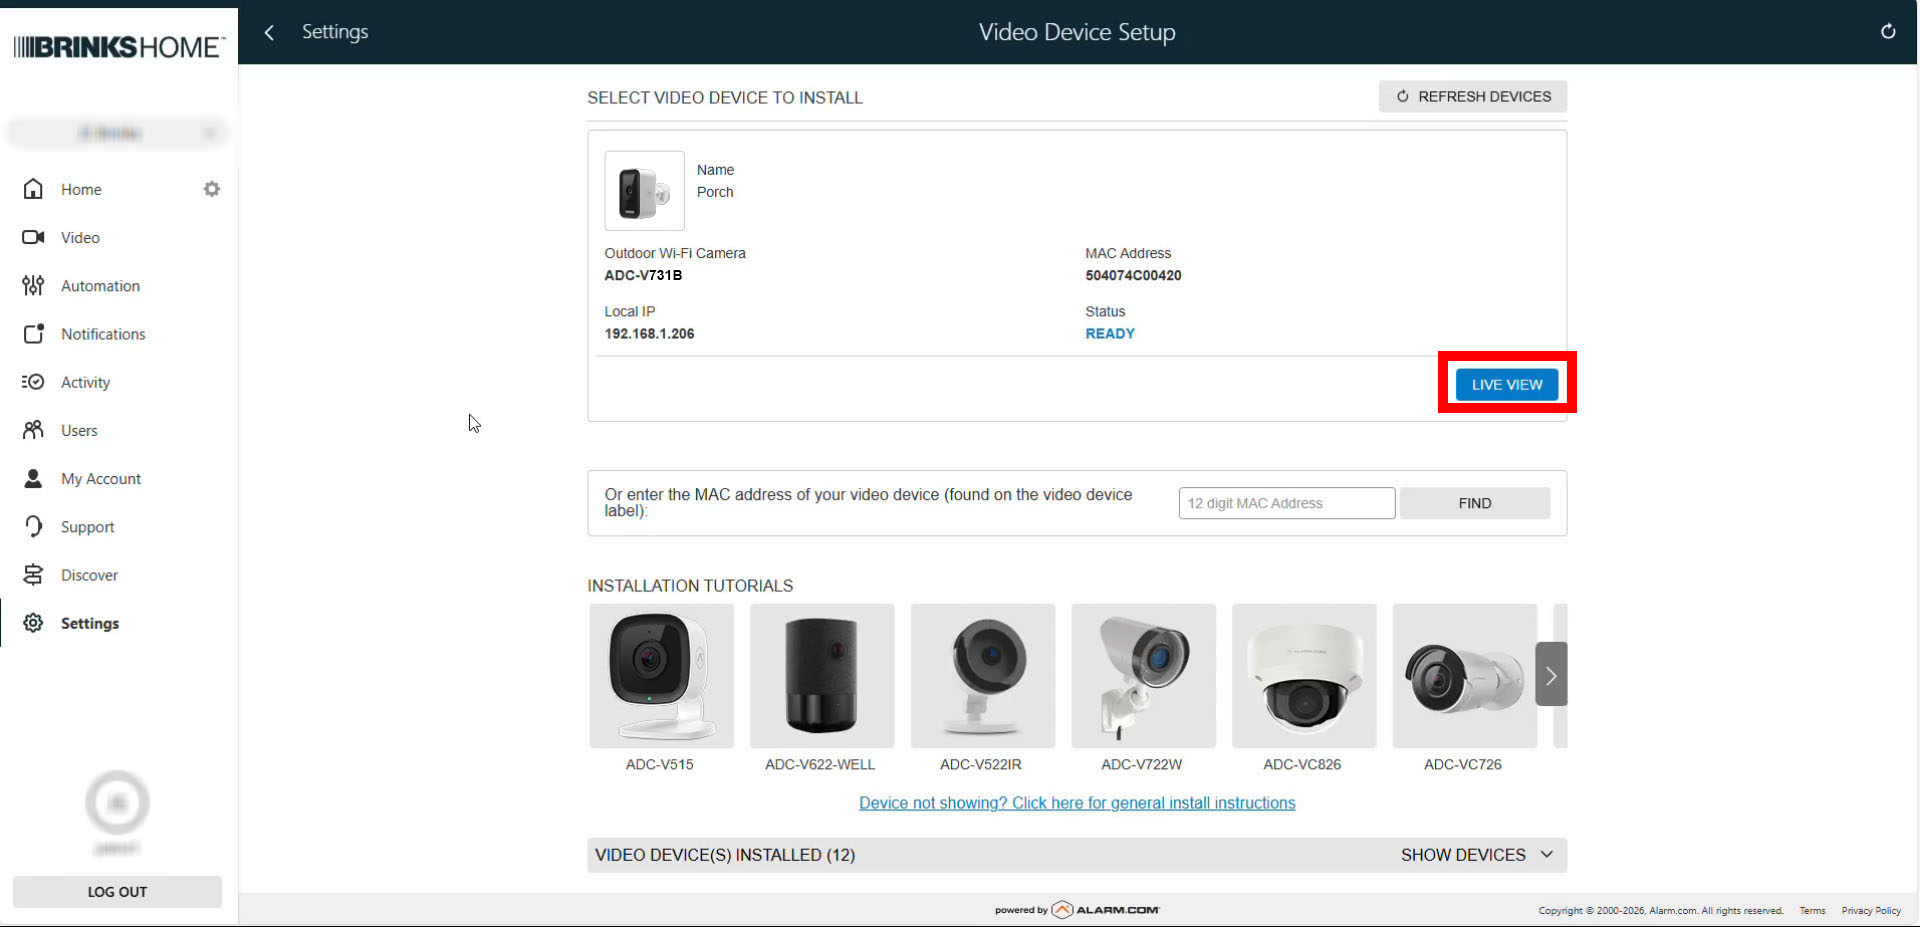
- When finished, select Live View to view images from the newly installed camera.


After adding your camera, you can set up recording rules. Click here to learn more.
Specifications
- 2688x1520 pixel video resolution
- White spotlight
- 15' infrared night-vision range
- MicroSD card slot
- Wi-Fi with two-way audio
- 12V-1.5A DC power adapter (included)
- Operating temperature of -4° F to 113° F
Factory Default
Warning: Performing a factory reset will erase all data. The camera must be re-added to your account to restore functionality.
- Open the camera by undoing the screw on the bottom of the camera, then press the button to release the back housing.
- Press and hold the reset button on the right side of the camera for approximately 15 seconds until the LED flashes red and green.
- Release the button to allow the camera to reboot to factory default settings.
- If the camera was previously installed on your account, delete it from the account before reinstalling.
Troubleshooting
If you're experiencing issues with your camera, try the following troubleshooting steps:
- Power Cycle the Camera: Unplug the power adapter, wait for about 10 seconds, then plug it back in to reboot the camera.
- Check Wi-Fi Signal Strength: Ensure the camera is within range of your Wi-Fi router. If the signal is weak, consider moving the camera closer to the router or using a Wi-Fi extender.
- Factory Reset the Camera: If issues persist, perform a factory reset.
If these steps don't resolve the issue, you can text us at 469.513.8685 or chat with us 24/7 for further assistance.
Checking the Battery Level of the Camera
- Open the Brinks Home™ app.
- Tap

- Tap

- Select the ADC-V731B camera from the list.
- The battery status will be displayed as a percent.


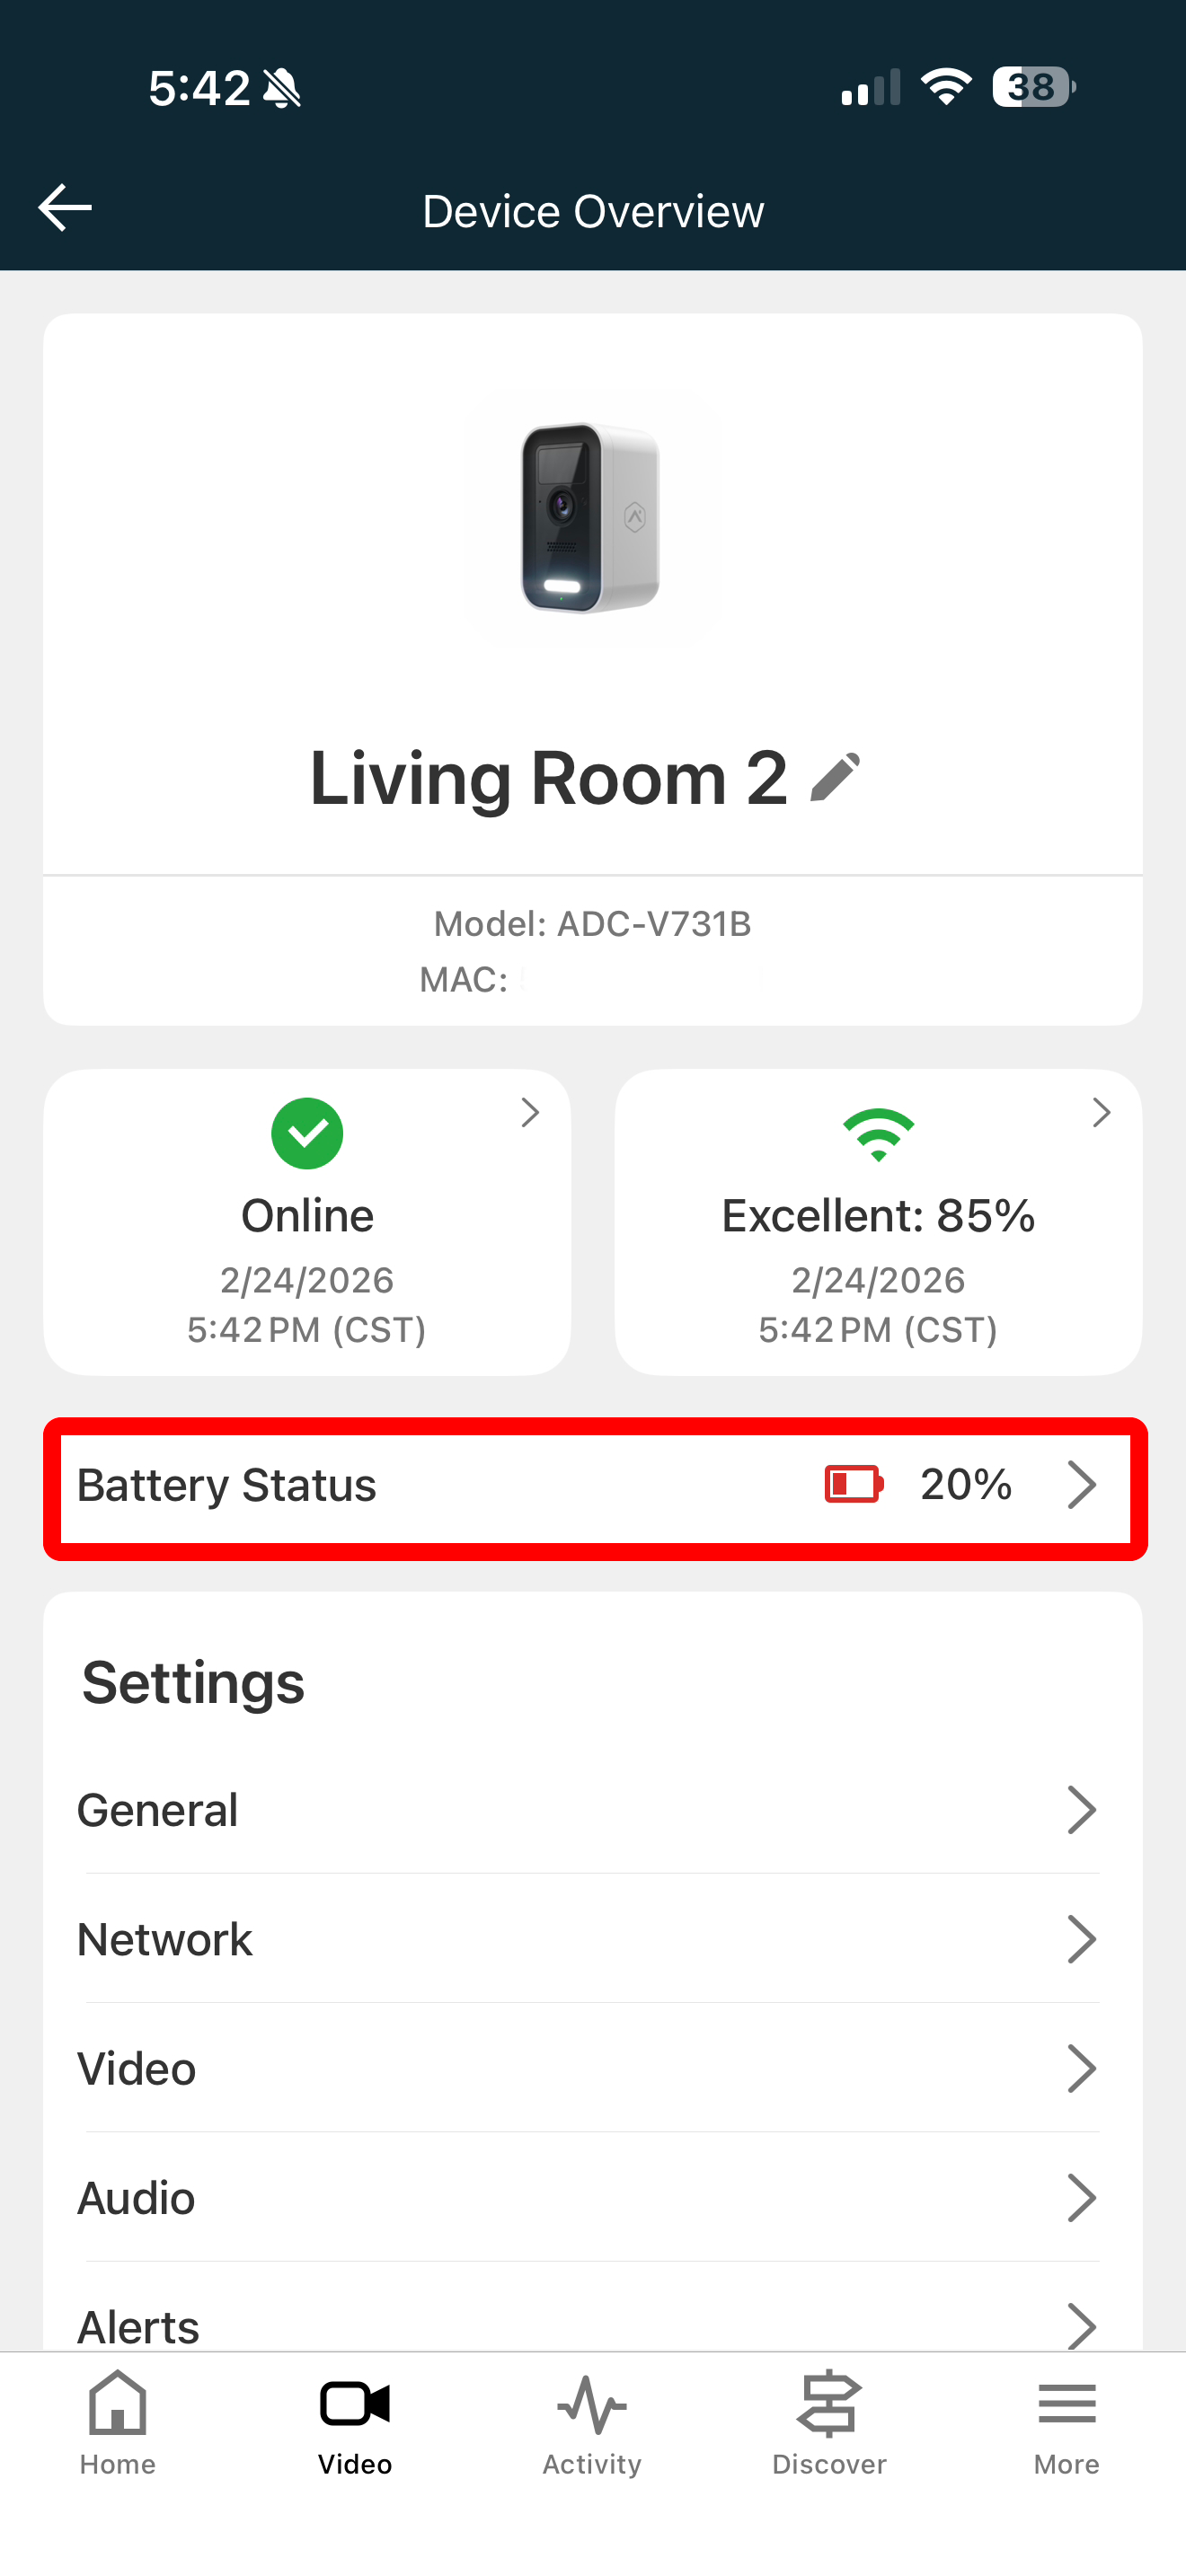
If the battery is low, it can be charged by the following methods:
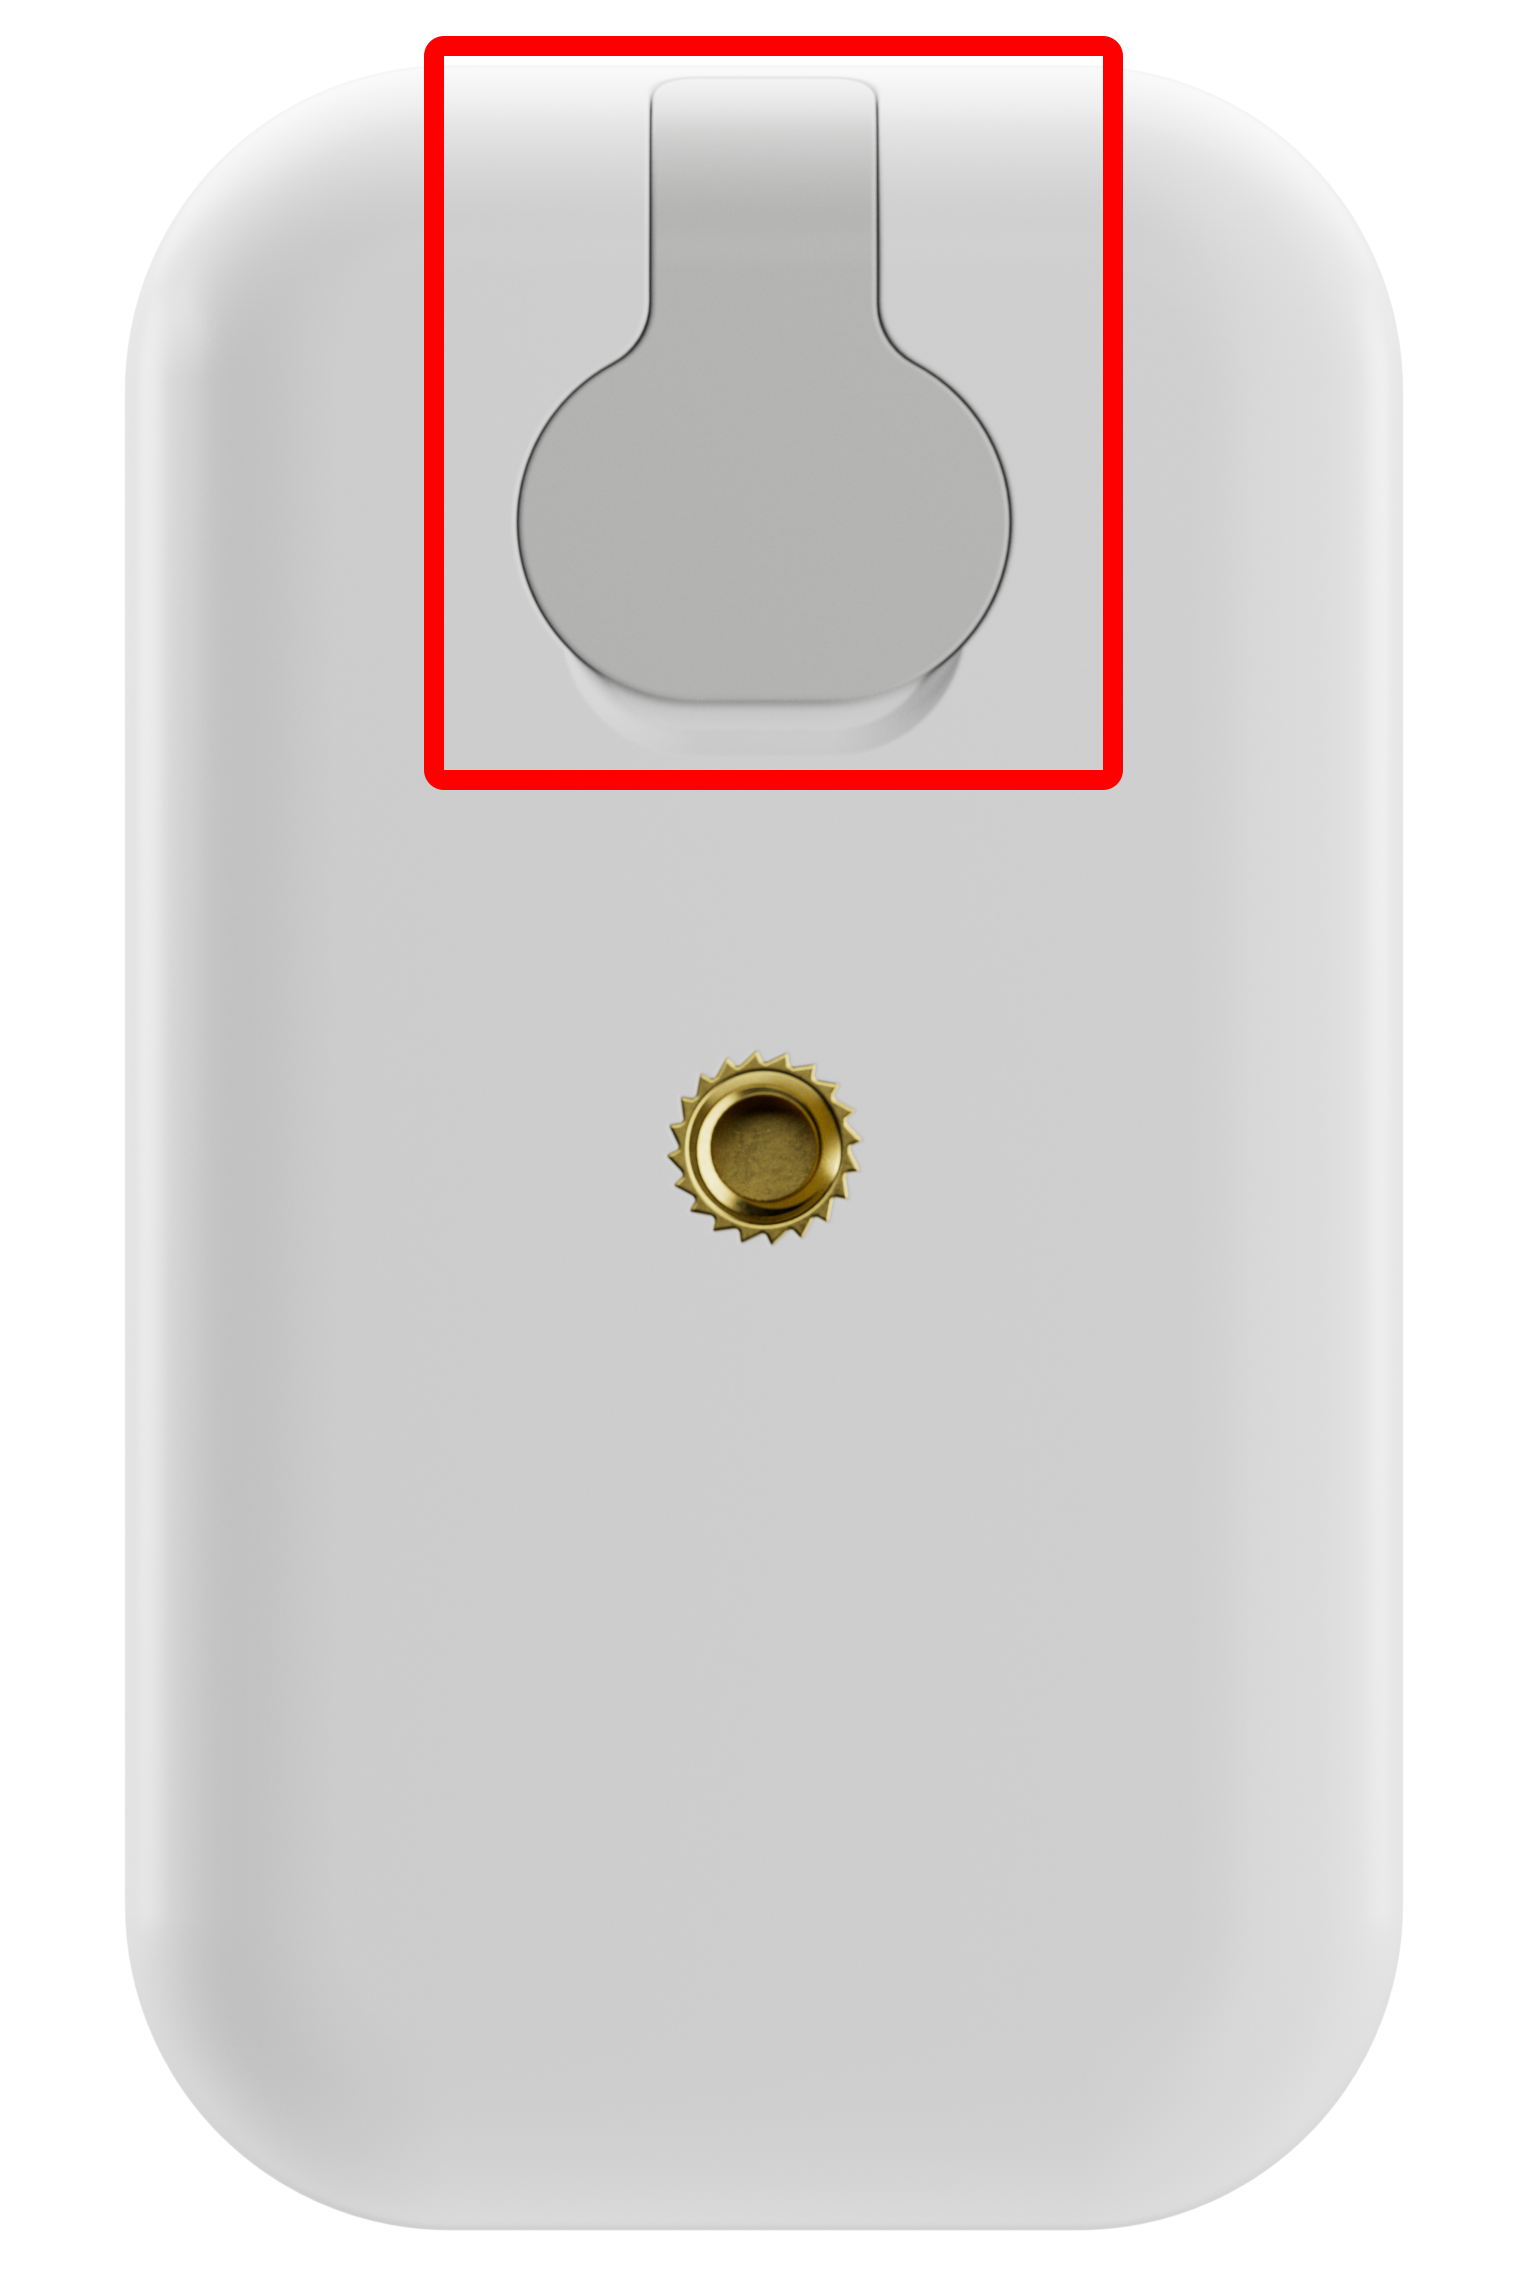
- Open the charge port on the back of the camera, then connect a USB-C cable.
- Remove the back housing from the camera by removing the screw from the bottom, then press the button to release the housing. Once the housing is removed, slide the battery from out of the camera and connect it to a USB-C cable.
LED Reference Guide
In-unit Charging LED Guide
Use the following LED guide when charging the camera while the battery pack is still installed in the camera.
Battery Pack Charging LED Guide
Use the following LED guide when charging the battery pack while it is removed from the camera.
If you need further assistance, text us at 469.513.8685 or chat with us 24/7 for an immediate response.